1. Scope of application: This standard applies to the inspection of all blanks and some process inspections; During outgoing inspection, selection should be made according to process requirements, and process
inspections should be carried out according to Level I standards.
2. Description: This standard is divided into two types: round and square; Among them, square blanks refer to square blanks after removing seed crystals, including thickness blanks and frequency blanks; A wafer
refers to a circular blank that has undergone rounding processing, including thickness blanks, frequency blanks, etching blanks, and polishing blanks.
3. DEFINITION:
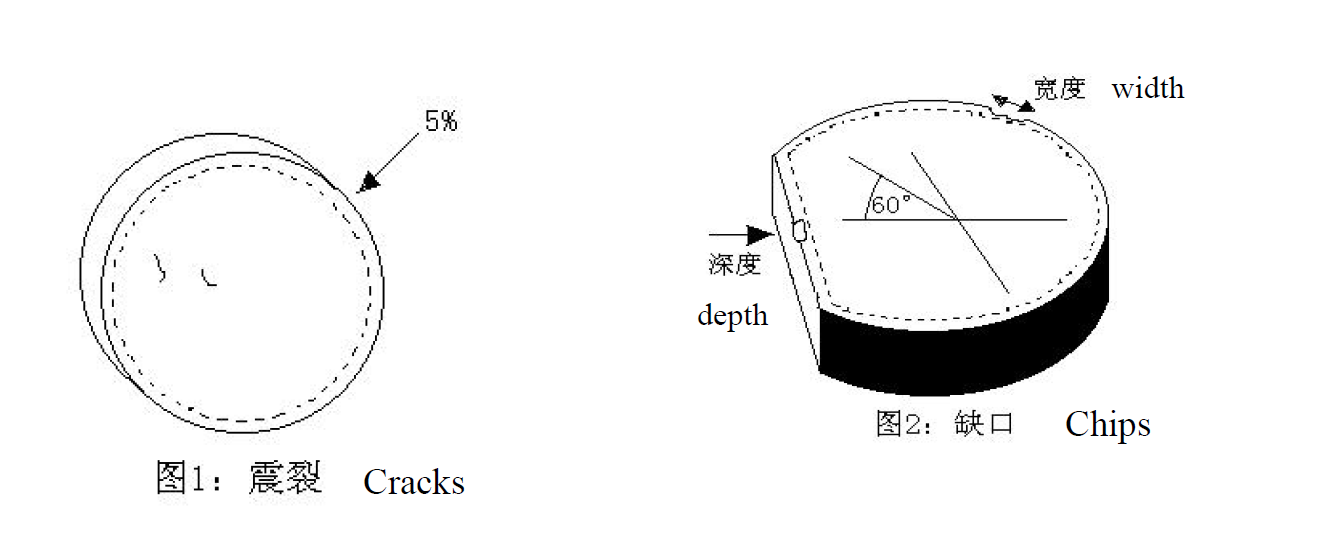
3.1 Cracks: bright dots or lines that appear under light, located at the center or edge of the chip, running through both surfaces of the chip, as shown in Figure 1; 3.2 Chips: Located at the edge of the chip,without penetrating the chip but only on one surface, as shown in Figure 2; 3.3 Missing corner: Refers specifically to a square chip, located at the four corners of the blank, penetrating or not penetrating the blank, as shown in Figure 3; 3.4 Edge collapse: located at the edge of the blank and penetrating through the chip, as shown in Figure 4;
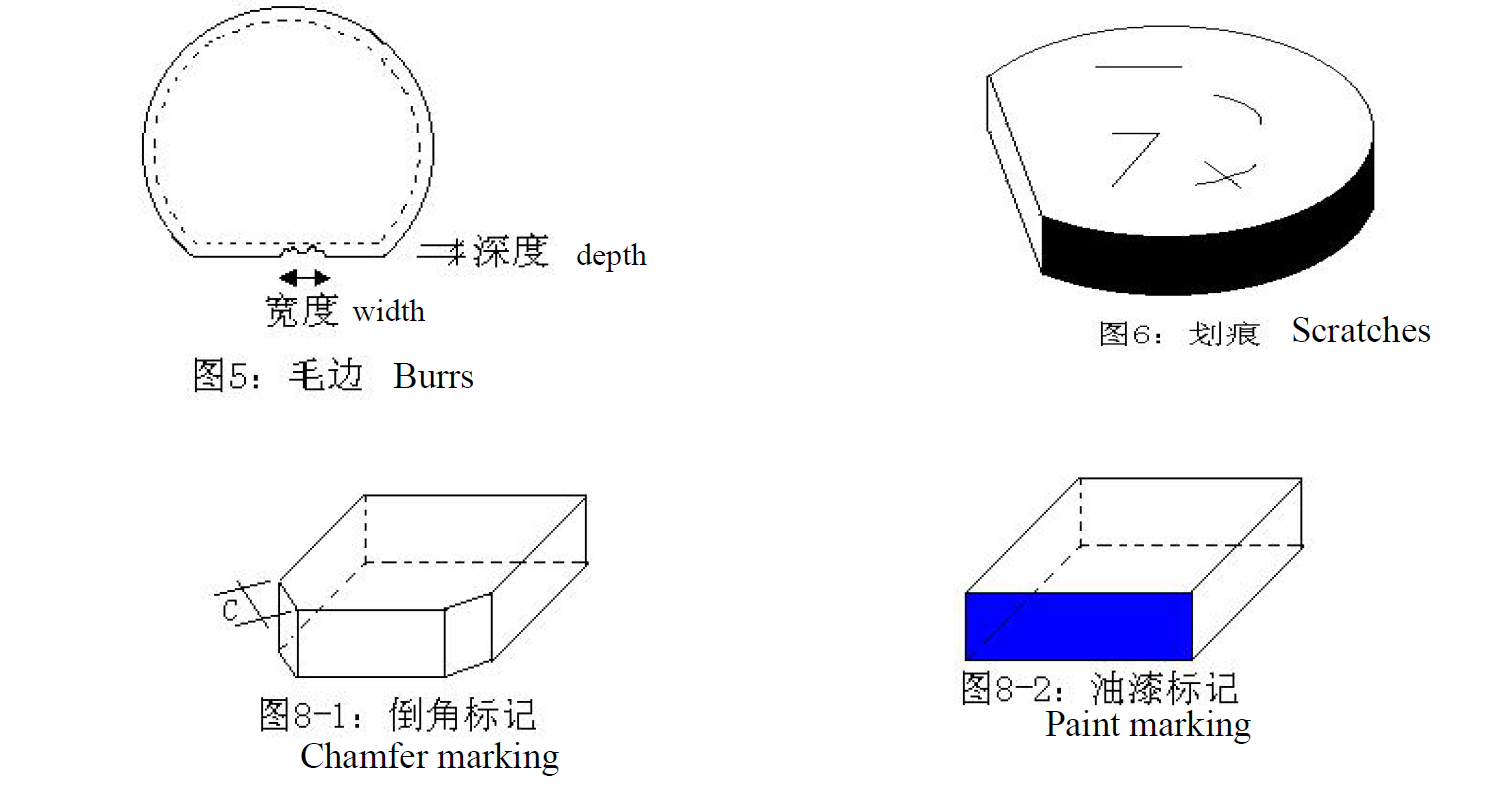
3.5 Burr edge: located at the edge of the blank, with many continuous notches or edges, as shown in Figure 5;
3.6 Scratches: straight or broken lines, located on the surface of the blank, as shown in Figure 6; The obvious scratches refer to those visible to the naked eye on black velvet and under light;
3.7 Dirty blanks: blanks with any stains visible on the surface of black velvet and under light;
4. Inspection standards:
4.1 Square blanks: divided into Grade I and Grade Ia
4.1.1 Grade I sandards:
4.1.1.1 Marking: There are two types of markings, as shown in Figure 8. ① Chamfer: Size C (as shown in Figure 8-1) should meet the process requirements and be accurately distinguishable; ② Paint: The color meets the process requirements and there is no peeling (see Figure 8-2);
4.1.1.2 Cracks: No cracks, as shown in Figure 9;
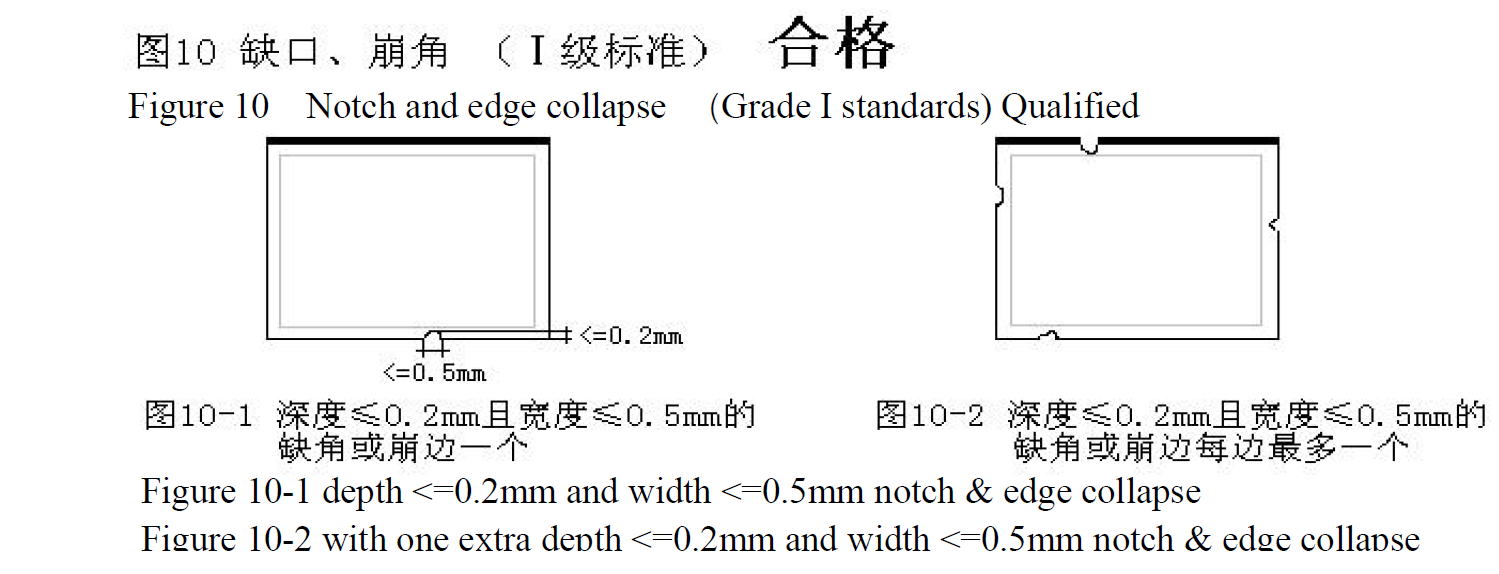
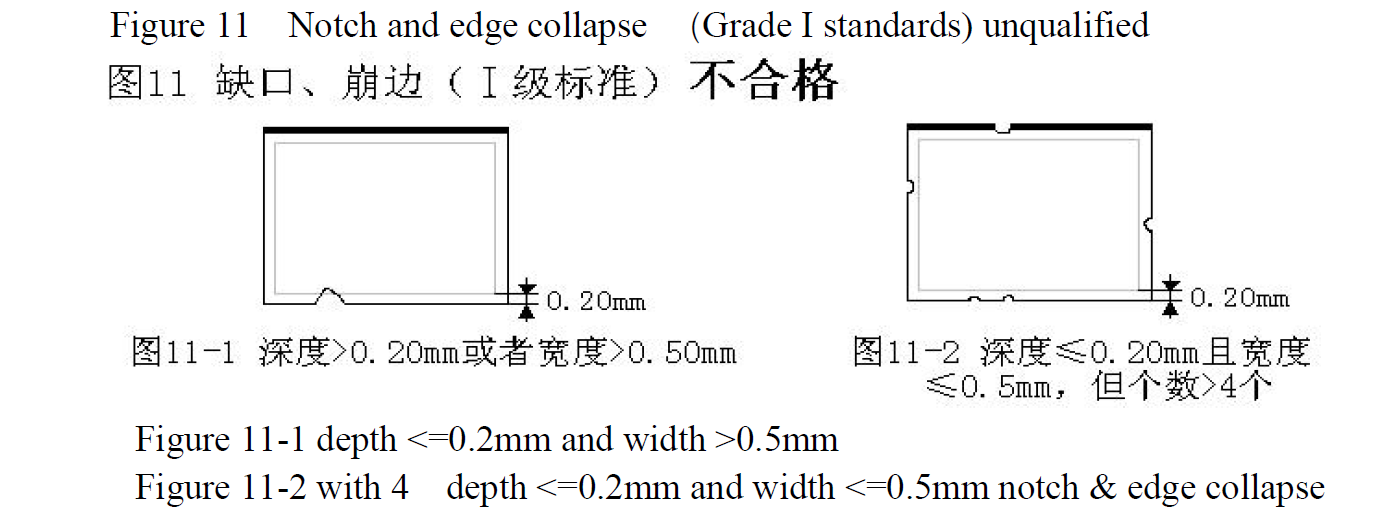
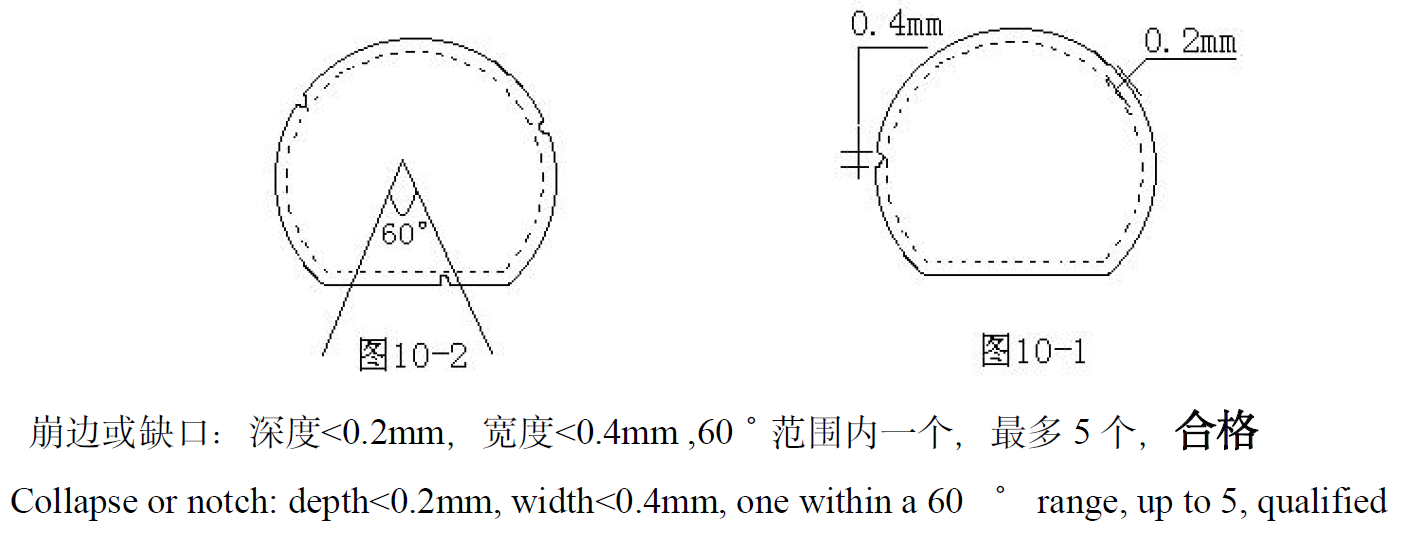
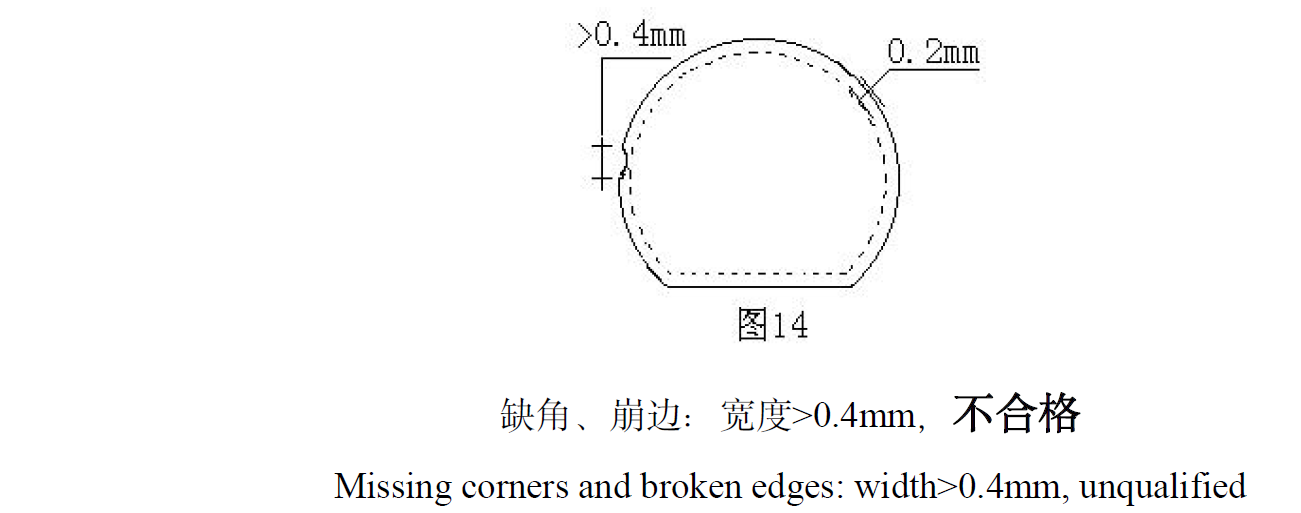
4.1.1.3 Notch and edge collapse: The depth deep into the center shall not exceed 0.2mm, and the width shall not exceed 0.5mm. Two or more such notches are not allowed on the same side, as shown in Figures 10 and 11;
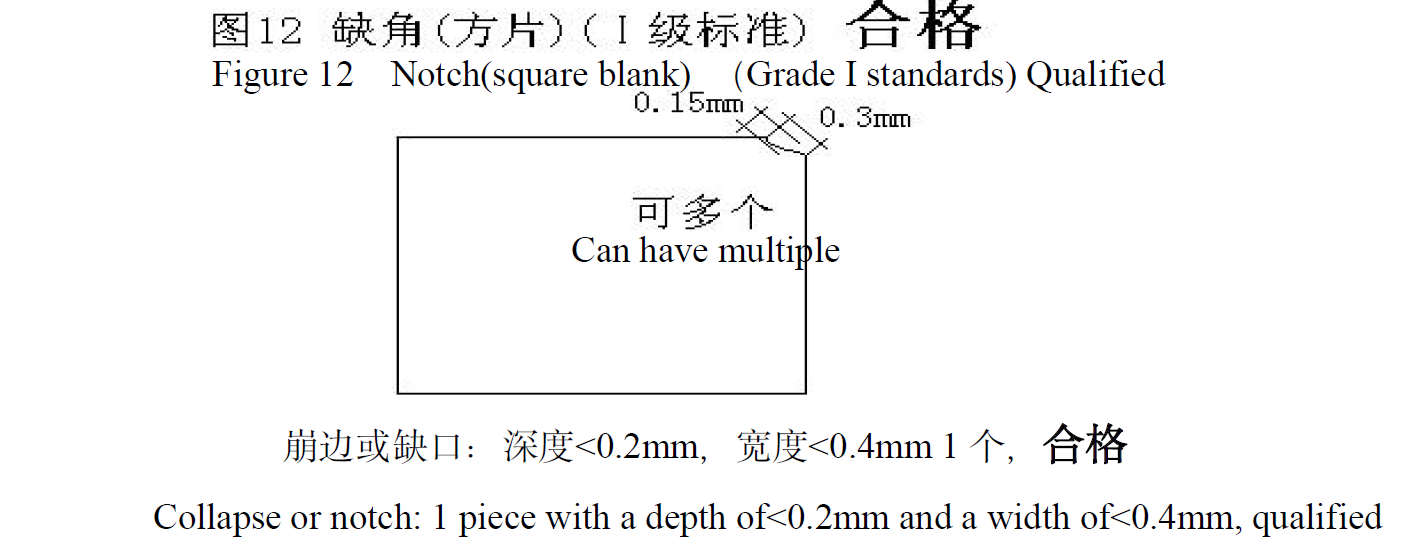
4.1.1.4 Missing corners: The depth into the center shall not exceed 0.3mm, and the width shall not exceed 0.5mm, but shall not cause confusion in the direction markings, as shown in Figure
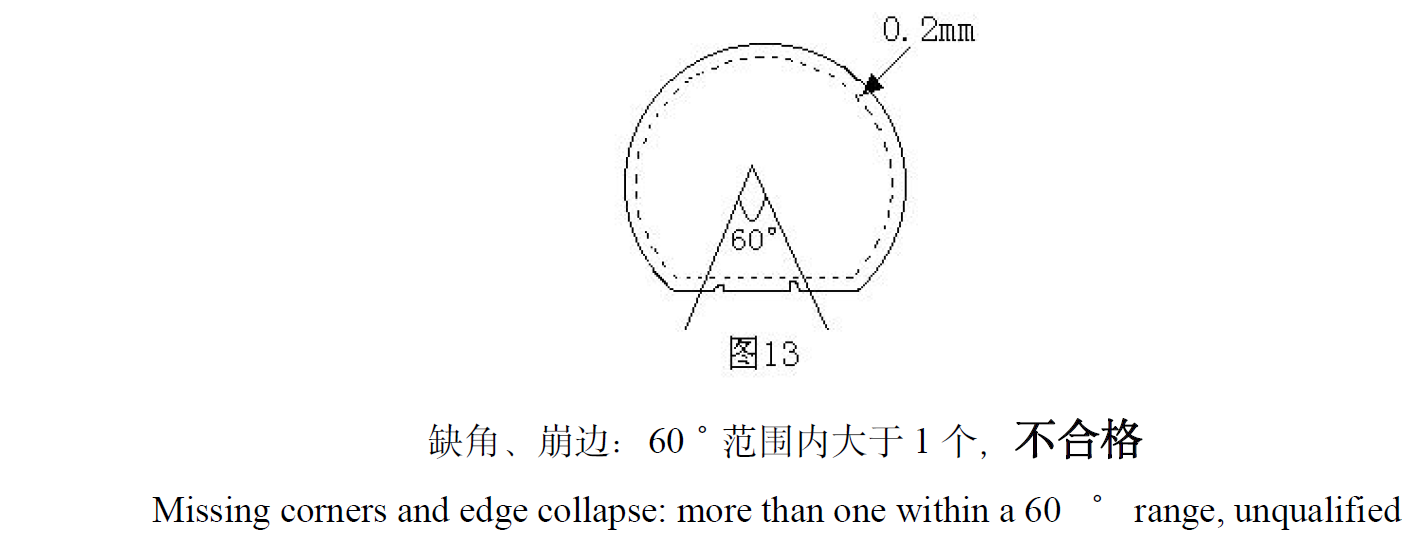
4.1.1.5 Burr edge: The depth of penetration into the center shall not exceed 0.1mm, and the width shall not exceed 1mm, as shown in Figure 13;
4.1.1.6 Scratches: Scratches are not allowed;
4.1.1.7 Dirty patches: No oil stains or other dirt are allowed
4.1.2 Grade Ia standards:
4.1.2.1 Marking: There are two types of markings, as shown in Figure 8. ① Chamfer: Size C (as shown in Figure 8-1) should meet the process requirements and be accurately distinguishable; ② Paint: The color meets the process requirements and there is no peeling (see Figure 8-2);
4.1.2.2 Cracks: No cracks, as shown in Figure 9;
4.1.2.3 Notch: The depth into the center shall not exceed 0.1mm, and the width shall not exceed 0.2mm, as shown in Figure 14;
4.1.2.4 Missing corners: The depth into the center shall not exceed 0.15mm, and the width shall not exceed 0.3mm, but shall not cause confusion in the direction markings, as shown in Figure 15;
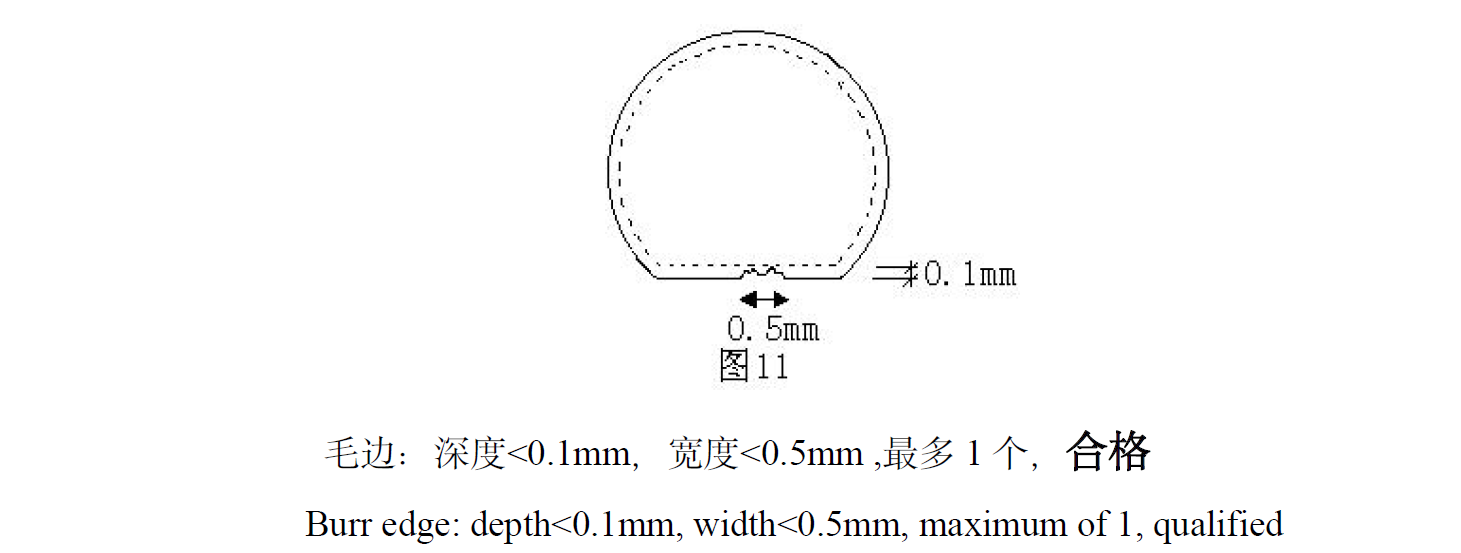
4.1.2.5 Burr edge: The depth deep into the center shall not exceed 0.05mm, and the width shall not exceed 0.5mm, as shown in Figures 20 and 21;
4.1.2.6 Scratches: Scratches are not allowed;
4.1.2.7 Dirty blanks: No dirt such as fingerprints, watermarks, or stains are allowed;
4.2 Round blanks: divided into Grade I and Grade Ia
4.2.1 Grade I sandards:
4.2.1.1 Cracks: No cracks;;
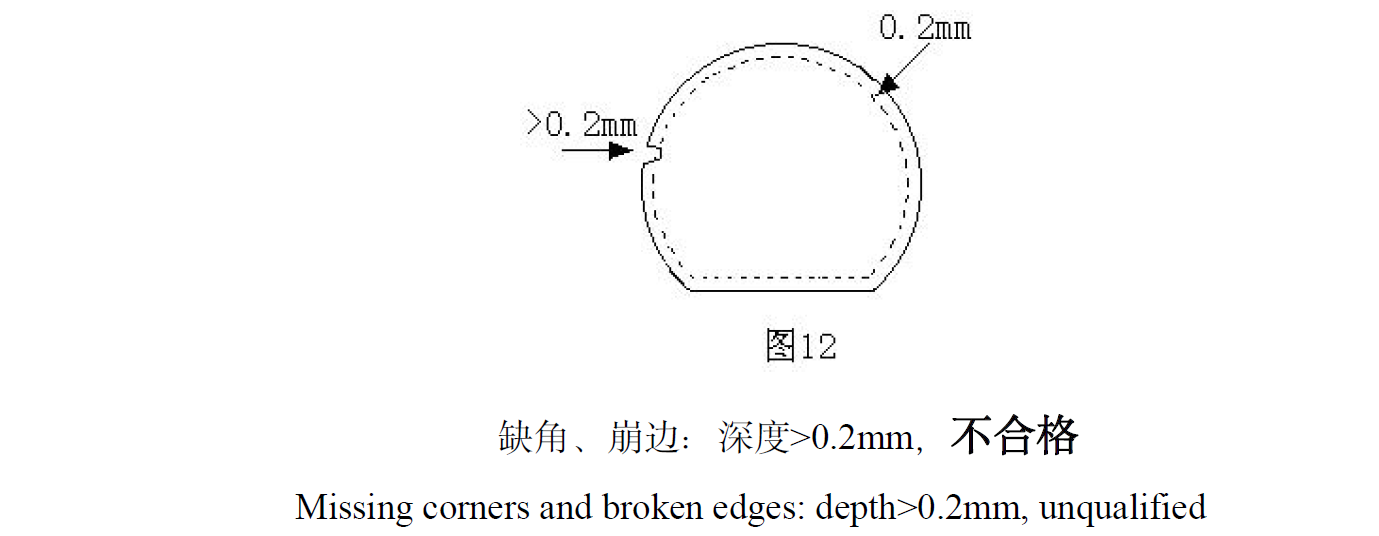
4.2.1.2 Notch: The depth into the center shall not exceed 0.2mm, and the width shall not exceed 0.4mm;
4.2.1.3 Edge collapse: The depth deep into the center shall not exceed 0.2mm, the width shall not exceed 0.4mm, and there shall be one within a 60 ° range, up to a maximum of five;
4.2.1.4 Burr edge: The depth deep into the center shall not exceed 0.10mm, and the width shall not exceed 0.5mm;
4.2.1.5 Scratches: Scratches are not allowed;
4.2.1.6 Dirty blanks: No dirt such as fingerprints, watermarks, or stains are allowed;
4.2.2 Grade Ia standards:
4.2.2.1 Cracks: No cracks;
4.2.2.2 Notch: The depth into the center shall not exceed 0.15mm, the width shall not exceed 0.2mm, and there shall be one within a 60 ° range, with a maximum of five;
4.2.2.3 Edge collapse: The depth deep into the center shall not exceed 0.15mm, and the width shall not exceed 0.2mm;
4.2.2.4 Burrs: No burrs;
4.2.2.5 Scratches: Scratches are not allowed. Non corrosive and polished chips should be inspected after corrosion;
4.2.2.6 Dirty films: No dirt such as fingerprints, watermarks, or stains are allowed;
5. Sampling standards:
According to standards at all levels, the allowable number of defects exceeding the tolerance is
5.1 Marking: According to GB2828.1-2003 sampling standard general level II (stricter), AQL=0.4;
5.2 Cracks: 0 pieces;
5.3 Gap: According to GB2828.1-2003 sampling standard general level II (stricter), AQL=0.4;
5.4 Edge collapse: According to GB2828.1-2003 sampling standard general level II (stricter), AQL=0.4;
5.5 Burr edge: According to GB2828.1-2003 sampling standard general level II (stricter), AQL=0.4;
5.6 Scratches: 0 pieces
5.7 Dirty films: According to the sampling standard GB2828.1-2003, general level II (stricter), AQL=0.4;





Copyright © Hangzhou Freqcontrol
Electronic Technology Ltd.
All Rights Reserved | Sitemap |
Powered by 